How to chain proxies (multihop) in v2rayNG on Android
Why is this needed?
In the current era of total surveillance and internet censorship, any VPN server could be monitored by the intelligence agencies of the country where it is located. For users concerned about their internet traffic privacy, we recommend connecting through a chain of VPN servers located in different locations. Even better - located in countries that are in conflict with each other, for example: Russia - EU/NATO countries, Armenia - Azerbaijan, China - USA, etc. This way you guarantee that your traffic cannot be decrypted and its source/destination cannot be determined, since the government agencies of these countries will not be able to cooperate.
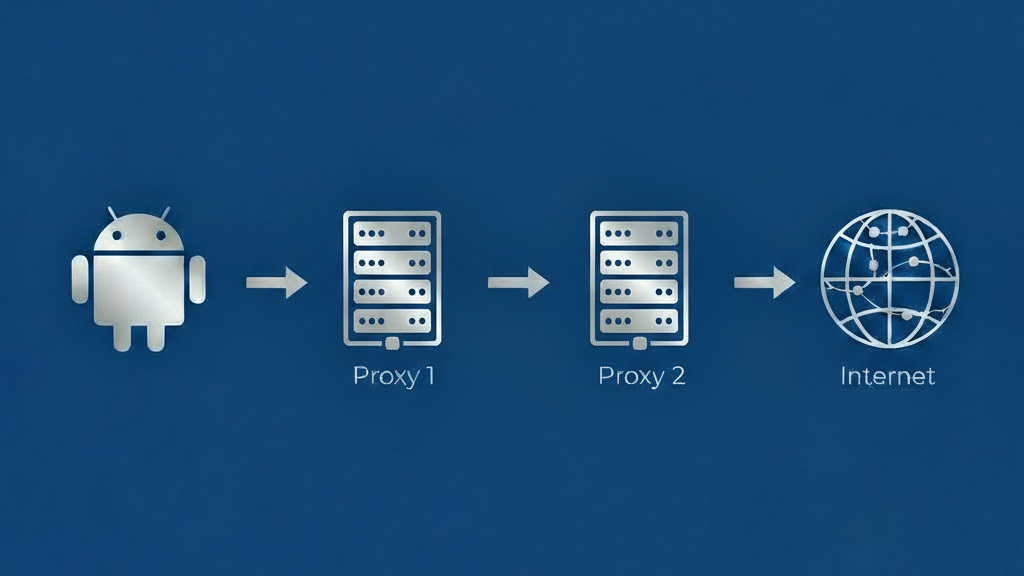
In this guide, we will explain how to connect to the internet through a VPN chain based on xray/v2ray (VLESS TLS/REALITY) on Android, using the v2rayNG application.
Requirements
If you haven’t installed v2rayNG yet, download and install the APK from the official GitHub repository: v2rayNG_1.10.23_universal.apk. In the application, you will need to create or import a connection group. If you use VPN.svoboda.center, then you have already imported our servers as a group using 🔗 Subscription link, you can continue reading (most likely, the group is not named very poetically: “import sub”).
Instructions
First, click on the connection groups tab. Select a server and it’s purpose: final connection (this server will be seen by websites and services, it is the last in the chain) or intermediary (this server will be used as a middle link). In our example, we will make the server in the 🇳🇱 Netherlands location as the final connection.
Click the edit button (pencil icon). 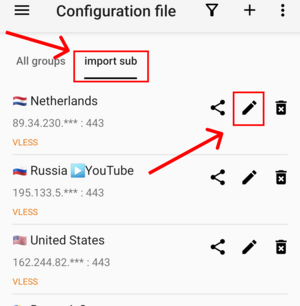
In the window that opens, completely copy the connection name (with all characters). 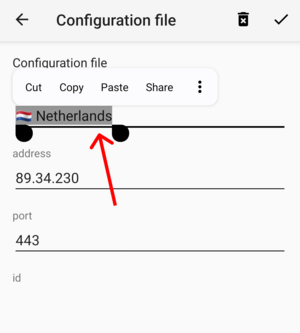
Next, go back to the main menu (top left arrow), click the menu button on the top left and select “Groups”. 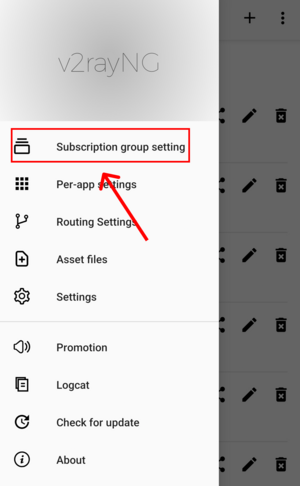
Click the edit button (pencil icon) for the group. 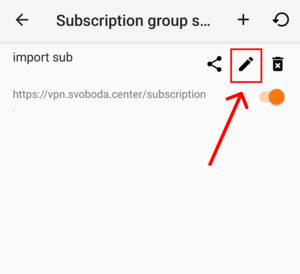
In the window that opens, scroll down to the end, you will see:
- “Previous proxy configuration” - this server will be used as an intermediary.
- “Next proxy configuration” - final connection: what we need.
In the “Next proxy configuration” field, paste the text from the clipboard: 🇳🇱 Netherlands and save by clicking the checkmark on the top right. 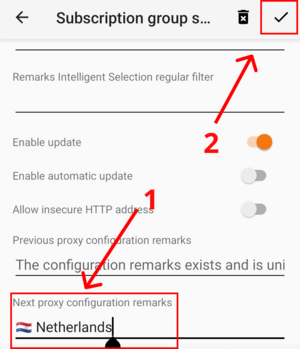
That’s all! Now, when connecting to any server in the group, traffic will first go through the selected server, and then be routed through 🇳🇱 Netherlands. Let’s check: connect to the server 🇷🇺 Russia▶️YouTube, go to check our current IP on the website i.pn. We see The Netherlands, Amsterdam - which means everything is working! Now the traffic goes first through Russia, then the Netherlands, and then to the final website. 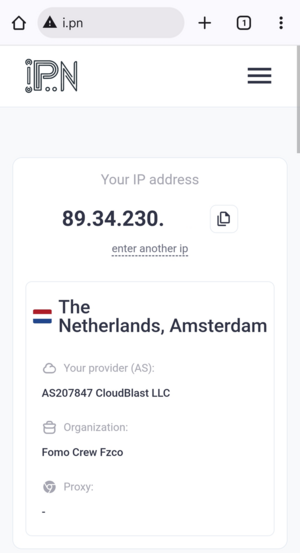
If you want to do the opposite (first Netherlands as intermediary, then Russia), then use the “Previous proxy configuration” field. 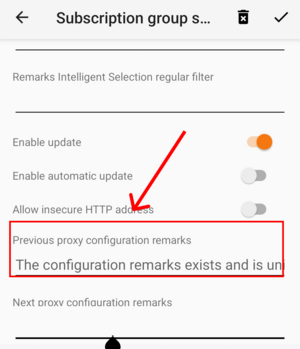
You can use BOTH an intermediary AND a final connection, then you will be connecting through 3 locations, but keep in mind: there may be significant speed loss.